Tuesday, December 27, 2011

Tee-rrific!

rHello peeps!

I hope everyone had a superb holiday season and you are all now gearing up for an equally magnificent new year's celebration!  Santa was very generous this year and I now have lots of new crafting goodies to play with, including a full set of Prismacolor Premier pencils!  I hope Santa was good to all of you too and I'm looking forward to seeing all your projects using all your new stuff.

I have been neglecting my blog lately as the holidays were very hectic for us this year, but I finally have time to show you the birthday card that I made for my hubby.  This is a true 'Dawn card,' complete with cheesy pun and a unique, but relevant embellishment.


Supplies:

Stamp - House Mouse
Paper - Bazzill card and Authentique DP from the Journey collection
Sentiment - computer generated
Ink - Black Stazon coloured with Distress inks (pumice stone, black soot, tattered rose, tumbled glass and faded jeans)
Other - fuzzy yarn, cotton string from my stash, golf tees are from a local golf shop and came already painted blue for me.

This card was inspired by a few challenges, but the only one that is still current is House Mouse and Friends, where they want to see your fuzzy and warm creations.  Golfing makes me think of warm weather, and the yarn is very fuzzy!

That's all for now.  Thanks for popping by and for taking the time to leave a comment!

Have a happy and safe New Year!  Sending you wishes for love, happiness, health and - of course - lots of creativity for 2012!

Hugs, Dawn 

Thursday, December 8, 2011

The Last of the Christmas Cards

Hi Peeps!

Hope everyone is having a splendid week so far!  First off, I want to welcome my new followers!  I'm very glad to have you along!

I probably don't have to remind any crafters of how close Christmas is getting...so in my haste to finish up my cards, I made a few quick cards that are the same, but a little different.  Though they are simple, I think they are very elegant and I love how they turned out. 

To simplify things, here is a list of supplies common to all four.  I will then list supplies unique to each card below that particular card's photo.

Common Supplies:
Paper - metallic cardstock (gold or silver) and white cardstock
Stamps - Inkadinkado Spirit of Christmas for sentiment and corners, embossed with fine gold or silver embossing powder
Other - focal shape cut with Cricut Sentimentals cartridge, Stickles in gold or Star Dust

Unique supplies - Martha Stewart snowflake punch (sorry I forget what this particular one is called), dazzling diamonds glitter

Unique supplies - Stampin' Up Tree Trimmings stamp set stamped in gold or silver Color Box pigment ink and embossed with Stampin' Up Iridescent ice embossing powder.

And the last one:
Unique supplies: McGill pine branch punch, Spellbinders Shapeabilities Layered Poinsettia cut from white card and painted with Lindy's Stamp Gang Magicals in Poinsettia Red Gold.  I love this paint - it is red with gold mica, which you can see when the light hits it just right.  Brad for centre of 'flower.'

These cards (one or all) are for the following challenges:
Simon Says Stamp - photo inspiration (and a stunning photo it is!)
Papertake Weekly - anything goes
ABC Christmas Challenge - Y is for Yippee! (anything Christmas goes!)
Sweet Stampin' Challenge - Snow (1st card)
Top Tip Tuesday - Let it Snow (1st card)
In the spirit of sharing, I have two tips this time.  My first tip is for the snowflakes.  I love this snowflake punch, but the tips sometimes just seem to fall off so easily.  So, to avoid this problem, I cover my cardstock with a piece of sheet adhesive - I use Sookwang, and before removing the top protective layer, I punch out the snowflake.  Once the snowflake is punched, remove the top film, exposing the adhesive.  Cover with your favorite glitter, and not only will the tips stay put, the snowflake is now sparkly and gorgeous! 
My second tip comes from the last card.  I really wanted to use what I had in my stash to make these cards, but I didn't have anything that I liked for the centre of the poinsettia.  So, I altered a brad.  The sparkly gold brad in the photo started out as a pastel purple brad with a 1 on it.  I started by taking a file (or you can use coarse sand paper) and scuffed up the shiny finish on it.  I then covered it in gold stickles and allowed it to dry.  Once dry, add a second layer of stickles to ensure complete coverage and allow to dry again.  What a transformation!

Thanks for stopping by and thank you for taking the time to leave a comment - I love reading them and it gives me the chance to pop by your blog to admire your handy work too.  Enjoy the rest of your week!

Hugs,

Dawn

Wednesday, November 30, 2011

Happy Anniversary

Hello Peeps!

It has been a while since I've posted!  I've been trying to stay on top of the December hurricane that is headed my way - Jesus, my husband and my son all decided to show up in December!  Before I get to my card for today, I want to welcome the new follower of my blog!  Very happy to have you and I do hope you enjoy!  I did try to visit you, as I always do, but could not find a link :(  If you post your work on the web, please drop me a line or leave a comment with your link so I can admire your creations too.  I have gotten so much inspiration and so many great ideas by following my followers, so I hate missing the opportunity.

On to my card for today then - I have an anniversary card to share.  I made a tag a while back that is similar to this card, so hopefully I am not boring anyone.  When my husband saw the tag, he mentioned that something similar would be perfect for a 60th wedding anniversary we were invited to.  My husband thinks I never take his suggestions, so I thought I would indulge him this time ;o).  Here is my card:
There is a lot of shimmer spray on this one - here is a photo capturing some of the sparkle:
Supplies:
Stamps - Stampin up Pretty Petals (retired) & En Francais, Hot Off the Press Stamp and Punch set
Cheery Lynn Designs dies - Fanciful Flourish, small Exotic Butterfly, and Italian Flourish doily
Lindy's Stamp Gang  - Starbursts - Silent night silver (for all the 'designer papers') and Frosted Forget me nots (a pale blue - used on the butterflies); Glitz Spritz - Scintillating Silver (used on the bits that are still white - this one just adds a lot of shimmer without really changing the colour much) 
Other - clear and silver embossing powder, silver and white card, rhinestones, circles and scallops cut with cricut

I would like to enter this card in the following challenges:

Simon Says Stamp - anything goes
Fab 'n' Funky - anything goes
Sweet Stampin' Challenge - punches and/or dies
Top Tip Tuesday - Silver, white + a hint of one other colour (the butterflies are pale blue, promise, though it is hard to tell from the photos with all the silver surrounding them)
My tip - For a more even application of your shimmer sprays and to save on waste from the spray going everywhere, try applying them with a paint brush.  Use a larger paint brush to cover large surfaces, such as the background papers I have created, and a small brush or small sponge to cover small surfaces such as the butterflies and flourish.  This way you save all the overspray, it is cleaner and you don't inhale the mist!

That's all from me for now!  Hope you enjoy the rest of your week & weekend.  Thank you for visiting and  also for taking the time to leave a comment!  I love reading them and visiting you back!

Hugs,

Dawn

Monday, November 14, 2011

All that Glitters.... can be photographed!

Hello Peeps!

First off, I want to welcome my blog's new follower!  Very happy to have you - I really appreaciate each and every one of you!  I hope everyone had a great weekend!  Mine brought snow, but just a light dusting so I don't mind... yet.  It did make me realize how close the holidays are - yikes!  So, I have another Christmas card to share today.  This card was definitely the source of many internal curses, especially when I managed to spill the bottle of shimmer spray and some splashed onto the sentiment.  Actually, that particular curse may have been audible to others too.  I also just realized that I forgot to put glitter at the bear's feet for the snow!  Where is my head today?  I think after all the fuss, I just wanted this one to be done! 

Card recipe:

Sketch - from Sketch Saturday
Stamps - image from Lili of the Valley, sentiment and corners from Close to my Heart Share the Magic and Gift of Love sets, respectively
Ink - black Stazon, Distress inks (pumice stone, black soot, fired brick and weathered wood)
Tools - stars cut with cricut (SCAL 2), Cheery Lynn Designs fanciful flourish die
Paper - SEI Silver Valley, Bazzill card
Other - ribbon and lace from my stash, Star Dust Stickles, Lindy's Stamp Gang Glitz Spritz in scintillating silver and blazing sun and I think that is all!

This card is for the following challenges:

Sketch Saturday 
Lili of the Valley - creature comforts
Papertake Weekly - first Christmas (or just Christmas)
Top Tip Tuesday - anything (Christmas) goes; see below for my tip
Charisma Cardz - cutesy

For my tip, I wanted to share how I photograph shimmer/glitter.  I have visited many blogs where the crafter has made a gorgeous project using shimmer and/or glitter, but you would never know it from looking at the photograph.  And, somewhere in the post there is always mention that the shimmer or glitter looks really nice, but they just could not manage to get a photo of it.  Problem solved!  In my first photo, I have stood the card up to take the photo, with the light source coming from above.  This is how most bloggers take their photos.  This will never allow the shimmer to show up.  To get that sparkle in your card, lay your card down flat directly under a bright white light source.  I have taken a photo of my set up to show how I take my photos.  It is a very simple set up using two sheets of bright white card and my Ott-light lamp (though any bright light will work).


Now adjust your camera angle until you see the shimmer in your screen.  The resulting photo sparkles:


Thanks for stopping by for a visit and thank you for taking the time to leave a comment.  I love reading them and it gives me the chance to pop over to see your work too!  Have a fantastic week!

Hugs,

Dawn

Tuesday, November 8, 2011

Fanciful Flight

Hello peeps!

Hope everyone's week is off to a great start!  I have a quick post to share a tag that I made with some of my new Lindy's Stamp Gang sparkly sprays and some amazingly beautiful Cheery Lynn Designs dies.  These products are so gorgeous, the end result is pretty much guaranteed.  I love how this tag turned out:

The beauty of Lindy's Stamp Gang products is their two tone colour and amazing sparkle.  The soft blue butterflies look silver when the light hits them just right.  Here is a shot showing some of the gorgeous shimmer:


Supplies:

Cheery Lynn Designs dies - Fanciful flourish, trimmed a bit to fit the tag and small Exotic Butterflies
Lindy's Stamp Gang sprays - Starbursts in Silent Night Silver for the background and Frosted Forget-Me-Nots for the butterflies.  Glitz Spritz in Scintillating Silver for the flourish.  All were applied with a brush or dauber, not sprayed.  These colours are available as a 'Try me kit' and they are so beautiful together.
Stamp - Stampin' Up - En Francais background stamp, embossed with clear embossing powder to create a resist
Other - tag cut with Sentimentals Cricut cartridge, some pearls on the butterflies, and the ribbon was recycled.  It was part of the packaging from the Lindy's Stamp Gang Try me kit.

This tag was inspired by the following challenges:

Cheery Lynn Designs - Make a tag.  This is their first of a new weekly challenge, with a great prize up for grabs, so be sure to check them out!
Allsorts challenge - anything but square
Cupcake Craft challenge - Textalicious (include text)
One Stop Craft Challenge - 3 is a magic number (It is their third blogiversary - Congratulations!)
and I would also like to link up to Make it Monday, where it is always anything goes.

Thanks for taking a peek - hope you liked my project.  Thank you for taking the time to leave me a few words too - I love reading them and it allows me to take a peek at your crafty creations as well!

Hugs,
Dawn

Sunday, November 6, 2011

Blinding Snow Flurries

Hello Bloggers,

Hope everyone had a fantastic weekend!  It appears that this may have been the last snow-free weekend of the year for the folks around my neck of the woods - the fluffy white stuff is on it's way.  So, I have made a holiday card with blinding snow flurries - though not the kind of blinding you get from a white out blizzard.  Here is the easy on the eyes shot first:

Ok, so we are all in agreement about the snow flurries, but what is so blinding about them?  I have recently acquired some goodies from Lindy's Stamp Gang, and their product is amazing!!  The background paper, which appears black in the first photo was created using heat emboss resist, and coloured with (LSG) Screamin' Banshee Black Starburst 'spray.'  It is a spray, but it can also be painted or applied with a sponge like applicator (which is also available from LSG and screws into the bottle to replace the spray pump).  One of the many beauties of their product is that they have a two toned nature.  So, catch the light just right and you see the second colour and tonnes of shimmer.  Now, I know most folks say they can't catch the shimmer with the camera and you just have to take their word for it - but consider yourselves warned (sunglasses...) - I have a natural talent for it:


Can you even believe that is the same card?  The colour is just amazing!  Ok, so enough praise has been sung.  Some other details about my card:

Paper - all plain white card from Stampin' Up
Stamp - Impression Obsession Snow Flakes Cover-a-Card, heat embossed with clear embossing powder
Dies - Spellbinders Create-a-Flake 3 (My tip: I stuck some Sookwang double sided adhesive sheets on the card before running it through the machine and then 'painted' them with Lindy's Stamp Gang Magicals in Silent Night Silver.  This is a mica powder that is intended to be mixed with water to create watercolour paint, but I just used a brush to apply the powder directly to the adhesive.) Flourish is Fanciful Flourish by Cheery Lynn Designs (I cut off the leaves and cut it into pieces and pieced it together to get the size and shape I wanted).
Other:  Lindy's Stamp Gang Screamin' Banshee Black Stardust Spray, Lindy's Stamp Gang Silent Night Silver Magicals, Rhinestones

This card was inspired by the following challenges:

Papertake Weekly - anything goes with optional sparkle and bling
Top Tip Tuesday - make your own background
Winter Wonderland - make your card sparkle
Jingle Belles - it came upon a midnight clear (I used clear embossing powder)
Crafty Hazelnut's Christmas Challenge - Bright colours and/or Sparkle

Thanks for stopping by and for taking the time to leave a few words.  I love reading them and it gives me the chance to visit you too!

Have a great week!  Hugs,

Dawn

Saturday, October 29, 2011

Nice and Squeek...Hmmm....I Mean Sweet

Hello Peeps,

Hope everyone is well!  A warm welcome to my blog's new followers!!  Very glad to have you! 

I have been going through card making/blog withdrawal as I have been busy getting costumes ready for Halloween.  We are all dressing up as puppies and the costumes my husband and I found needed a lot of love.  They finally look like puppies, so I immediately headed into my craft room to get my 'fix.'  I tried to make a CAS vintage card - not sure if I pulled it off with the mice!  What do you think?


Supplies:

Image:  House Mouse - I cheated again and used a sticker, though someone will undoubtedly compliment me on my colouring job ;).
Sentiment: Hot Off the Press Christmas Stamp and Punch
Paper: MME Lost & Found Christmas
Ink: Distress Ink vintage photo
Other: Gold Stickles following swirly pattern in corner and on star, star and oval cut with cricut

This card was inspired by the following challenges:

Winter Wonderland - CAS
Totally PaperCrafts - Glitter it
ABC Christmas - V is for Vintage
Jingle Bells - Not a creature was stirring (these mice are obviously not familiar with that one)
Papertake Weekly - for the wonderful sketch
Simon Says Stamp - Anything goes

Thanks for taking a peek and for taking the time to leave a comment - I really appreciate them and love having the chance to take in your creations too.  Have a great week and a safe and happy halloween!

Hugs,

Dawn

Tuesday, October 18, 2011

I'm Dreaming....

Well, dreams of a white Christmas usually turn into nightmares by the time January comes around in this part of the globe, but I do enjoy a pretty fluffy snowfall during the holidays. 

Hope everyone is well and had a tremendous weekend!  A huge welcome to the new followers of my blog!  I'm very happy to have you along!  I did try to visit everyone, as I always do, but again there were some people that I could not find :(  If you are one of these peeps and you're reading this, please do leave me a comment so I can find you and admire/get inspiration from your crafty creations too.

As you've probably already figured out, today I have another holiday card to share:
I found this beautiful stamp at a paper crafting fair that I went to a few weeks ago and just fell in love with it! It was one of many in a beautiful collection, so it was so hard to choose just one - but I stuck to the budget and this is the one that came home with me.

Supplies:

Stamp - by Northwoods Rubber Stamps Inc.
Paper - Bazzill card, sei Silver Valley, 300 g hot pressed watercolour paper
Ink - Stazon black, Distress inks fired brick, barn door, rusty hinge, vintage photo, frayed burlap, and stormy sky
Other - Nellie Snellen corner die (I have to warn you if this is the first time you are seeing these corners and are already digging out your credit card - they do not cut all the way around the corner.   After running it through your machine, you have to trace the inside edge and cut it by hand.  Well worth the effort though.), Spellbinders Create a Flake 3 dies,   Our Craft Lounge Sparkly Fluff in sugar for the snow on the branches, Xmas red Stickles, Glitter Ritz micro fine glitter  in warm highlight, red rhinestones and silver cord from stash and the ribbon was sold by the meter at a local craft store but unfortunately, I did not look at who the manufacturer was.  Love that it was already box pleated - perfect, as I have been known to do this myself by hand to frame images so this was a real time saver.


This card was inspired by these fun challenges:

Jingle Bells and Sparkles Christmas Challenge both wanted a project inspired by a Christmas song.  I was inspired by White Christmas.
ABC Christmas Challenge - U is for unused stash.  Here is a photo of my never before used items:
Pink {Ink} Sketch Challenge - for yet another gorgeous sketch
Cute Card Thursday - Tree-mendous

Thank you so much for popping by.  I hope you have enjoyed my card and thank you for taking the time to leave a comment - I love reading them and it gives me the opportunity to visit your blog as well!

Have a great week & hugs,

Dawn

Monday, October 10, 2011

A Warm Winter Hug

Hi Peeps,

A warm welcome to my new followers - I am so happy to have you!  I always visit those who leave comments and, of course those who follow me, but recently there have been a couple followers that I could not locate.  I am assuming that it is because you do not have blogs?  If you are one of these gals and you do have a blog, please drop me a line with your url - I would love to visit and admire your work too!

Hope everyone had a great weekend - and a great long weekend/happy thanksgiving to those who live in parts of the globe who celebrated this weekend.  There was soooo much food, but I didn't indulge myself too much.  I'm holding out for Christmas to partake in complete gluttony :o)

Speaking of Christmas, I have a festive card to share today:


Sadly, my computer has reached its end and is currently being reincarnated so these are photos in the raw. :(  Hopefully I will have my lifeline back in the next couple of days.

Supplies:

Stamps - Sugar Nellie (warm winter wishes), Hot Off the Press (Christmas Stamp and Punch)
Paper - Bazzill and Stampin' Up cardstock, SEI Alpine Frost, My Mind's Eye I believe
Ink - Stazon (black), Distress inks (tattered rose, black soot, peeled paint, rusty hinge)
Other - lace (Kaiser), glitter (Stickles - star dust, Stampin' Up - dazzling diamonds and iridescent ice embossing powder), green rhinestones (Kaiser), Spellbinders Create a Flake 3 and machine stitching.  This is my first attempt at machine stitching and it was a bit of a learning curve.  One should always check to make sure the bobbin has enough thread to avoid having to hand stitch like I had to.


This card was inspired by the following challenges:

The Sugar Bowl - Sketch and photo inspiration
Simon Says Stamp Challenge - Sparkle and bling
Totally Papercrafts Challenge - Animals
The ABC Challenge - Anything goes
Sweet Stampin' Challenge - In stitches

Thanks for stopping by!  Hope you have a great week!

Hugs,

Dawn

Tuesday, October 4, 2011

Birthday Bear

Hello Peeps!

Hope everyone had a great weekend!  First off, I would like to welcome my new followers - so happy to have you along! 

Today I have a birthday card to share that I made for my son's second birthday:


My computer is currently broken :( so no photo editing today.  I had to borrow my husbands laptop to do this post.  I tried to include as many of my son's favorites on this card - so lots of buttons, the circular shape, the car and the corrugated paper.  I think he will really like it, at least for a short while before he starts trying to tear it apart. 


Supplies:

Papers/card: My Mind's Eye Alphabet Soup boy and Bazzill card
Stamp:  Lili of the Valley
Ink/colour: Stazon black, Distress vintage photo, frayed burlap, fired brick, tea dye, pine needles, antique linen and water colour pencils (yellow and orange)
Other: Fiskars paper crimper, My Mind's Eye Lush 2 orange buttons, American Crafts sparkly buttons, glossy accents, Songbird Cricut cartridge for the 2.

This card was inspired by the following challenges:

Lili of the Valley - button it
Pink {Ink} Sketch Challenge - for the wonderful sketch
Here Come the Boys - wheely nice
Simon Says Stamp Challenge - anything goes
Cute Card Thursday - animal crackers
Stampin' for the Weekend - what a cutie
Papertake Weekly - Anything goes with optional punch + a birthday blog hop!
and I am also linking this card up to the Lili of the Valley Ideas to Inspire World Card Making Day giveaway.

Thanks for stopping by!  Have a great week!

Hugs,

Dawn

Wednesday, September 28, 2011

Gingerbread, Spice and Little Mice

Hello Peeps!

Hope everyone is having a wonderful week so far!  I have another quick(ish) Christmas card to share today:


Supplies:

Image - House Mouse.  Ok, I have a confession to make - this image was not stamped, it is actually a sticker.  In my defense, I did embellish the image with Glossy Accents and Distress Stickles!  When I saw this adorable sheet of House Mouse Christmas stickers, I couldn't resist them - I thought they would be a fabulous way to get a bunch of cards done more quickly.  But then, it turns out that in my immense stash of Christmas papers, I did not have a single one to match, so I ended up having to make my own DP, which made the whole process not quite as quick as I had hoped (and yes, I know, that is one long run on sentence).  I think the moral of the story is that I need a bigger stash...

Stamps - sentiment and frame from Hot Off the Press Christmas Stamp and Punch set
Ink - Distress Tea Dye
Tools - Martha Stewart border punch, Crafter's Workshop mini Swiss dot template
Other - Glitter Ritz transparent micro fine glitter, Distress Stickles rock candy (on the gum drops - I don't know if it shows in the picture, but this really makes them look sparkly and sugar coated), Glossy Accents (on the candy cane, peppermint and doormat), ribbon recycled from an old blouse, Ranger wonder tape for making glitter strips, Versamark marker and Stampendous Star Dust embossing powder for making the glittery Swiss dot background, and liquid applique pen for framing the image (I kind of thought it looked like the icing!).  I think that is all.

This card was inspired by the following challenges:

House Mouse and Friends - Christmas Sparkle
Papertake Weekly - for the wonderful and easy to use sketch
Allsorts Challenge - keep it simple
Simon Say Stamp Challenge - anything goes

Thanks for visiting!  Hope the rest of your week is fabulous!

Hugs,

Dawn

Monday, September 26, 2011

Something Fishy

Hello Folks,

First off, I want to welcome my new followers!  So glad to have you!  I hope everyone had a great weekend!  Mine had some exciting moments.  A beautiful stray husky found me Friday evening.  I couldn't just let it run loose, so I kept it overnight until animal services came to pick it up the following day.  When I took it for it's morning walk, it mistook me for a tree!  Apparently, it really did have to go, for the 11th time.  Luckily, I have fast reflexes and avoided a shower, but I sense a trend...  Oh, well - I'm sure some peeps who witnessed the ordeal got a little chuckle out of it anyway. 

Today, I have another birthday card to share with you.


Supplies:

Paper - Bazzill card, Stampin' Up DP
Stamps - Magnolia, Hot Off the Press
Inks/colour - Black Stazon, Distress Inks (walnut stain, tattered rose, broken china, antique linen) and watercolour pencils (browns and oranges, various brands to match paper)
Tools - Martha Stewart border punch, Spellbinders die
Other - seashells collected from the beach, netting, pearls

This card was inspired by the following challenges:

Magnolia-licious - brown, orange and teal
Magnolia Down Under - fancy folds
Simon Says Stamp - use dies and/or punches
Pink {Ink} Sketch Challenge - for the beautiful sketch

Thanks so much for stopping by!  I really appreciate all your comments and love to read them - thanks for taking the time to leave one!
Have a great week!  Hugs,

Dawn

Monday, September 19, 2011

Chocolat

Hello Peeps!

Hope everyone had a wonderful weekend - the last official weekend of summer! :( Did anyone even get a summer?  I'm feeling a little cheated by mother nature at the moment...

Before I get on to my latest creation, I want to welcome my new followers - I'm so glad to have you along!

I took a little break from making Christmas cards, so today I have a birthday card to share:
Supplies:

Paper: Bazzill and Stampin' Up card, 300g hot pressed watercolour paper, My Mind's Eye DP
Stamps: House Mouse - Birthday Cupcake and Stampin' Up - Look Who's Turning
Ink: Stazon - brown and Distress Inks - black soot, tattered rose, pine needles, walnut stain, frayed burlap, old paper
Other: Cream ribbon for flower is recycled from a gift bag, other ribbon and lace from my stash, McGill pine branch punch, Cheery Lynn French Pastry Doily, wood and glass beads from my jewelry making stash, circle punch for flower base, Stampin' Up dazzling diamonds for frosting


This card is for the following challenges:

House Mouse and Friends - Birthday with optional flowers (it is their birthday, so they are also having a fun blog hop)
Top Tip Tuesday - Birthday time
My tip is a really simple one - while perusing blogland, I came across a blog which recommended making circular cards by cutting two scalloped circles, scoring a straight line across the top three scallops on the back side of the card and adhering the top of the two circles together with strong adhesive.  This being my first ever circular card, I followed these directions without thinking about the physics of it.  However, it would work much better if you scored across an even number of scallops - that way, the score line will sit parallel to the table top when the card is propped open, allowing it to balance better.  Also, larger scallops would work better.

Simon Says Stamp Challenge - Inspired by a song or movie title- I was inspired by the movie Chocolat.  The little mouse sleeping on the chocolate cupcake reminds me of the scene where the Comte had a little snooze in the shop window after 'sampling'  the display.  To go along with the theme, I used the French Pastry Doily and the MME paper with the loops on it reminds me of the swirls that are often used to decorate chocolates.

Flourishes Timeless Tuesday - Shaped card
Creatalicious Challenge - anything goes
Cute Card Thursday - anything goes
Allsorts Challenge - alter/recycle (my flower is made from ribbon recycled from a gift bag)

Thank you for stopping by and for taking the time to leave a comment - they are very appreciated.  Have a great week!

Hugs,

Dawn

Wednesday, September 14, 2011

QAS - Quick and Simple

Hi Peeps,

Hope everyone's week is going well.  A very quick post today to share a very quick card I whipped together using this fabulous French Pastry doily die I discovered by Cheery Lynn Designs and stamps by Hot Off the Press.   Stickles are still wet!
This card is for the following challenges:

Cheery Lynn Designs - anything goes
Stamp Something - their final challenge :(  so anything goes
Craft us Crazy - autumn colours and/or use your favorite embellishment.  Mine is ribbon.

Thanks for stopping by!

Hugs,

Dawn

Monday, September 5, 2011

Not Too Shabby

Hello peeps!

Hope everyone is well!  Things have been a bit exciting for us this week as our son is getting closer to becoming fully potty trained.  Well, my poor cat might not use the word 'exciting.'  We all know that cats don't enjoy getting wet on the best of days, but an unexpected little shower as she wandered across the bathroom was a whole new level of insult...

But speaking of exciting - I am very excited to share my latest creation with you.  I was very inspired by a shabby chic tutorial I saw on the Stampartic blog and I knew the moment I saw it that I wanted to give it a try.  Luckily, there were a couple of shabby chic challenges this past week with even more great inspiration and examples, so I just had to make a card.  This really is quite a different style than I am used to and I found it very challenging. 
Supplies:

Stamps - Silent Night Tilda (Magnolia) and Bells and Boughs (Stampin' Up)
Paper - Bazzill and Stampin' Up card, 300g watercolour paper and Bo Bunny Midnight Frost DP
Ink/Colouring - Stazon (black), Distress inks (walnut stain, antique linen, pumice stone, weathered wood, stormy sky, black soot, forest moss), watercolour pencil (skin), Distress Stain (picket fence) and Adirondack Mixatives (snow cap)
Other - Distress stickles (rock candy), pearls (stash), Tim Holtz ribbons, Stampin Up snowflake die, Spellbinders fancy tags 2, jingly bells (found in my stash), crochet lace (from a friend's garbage - no that isn't a brand name; a friend of mine actually threw that out after using part of it on a scrapbook layout), cotton fabric (from my old curtains), liquid applique (unheated because I'm a bit of a chicken and was afraid I would wreck my image and I liked how it looked without heating it) and I think that is all.

Tilda's close up:
And an artsy view:
I would like to enter my card in these challenges:

Stampartic - Shabby Chic
Top Tip Tuesday - Shabby Chic
(my tip - Picket fence Distress Stain is the perfect product to use on porous surfaces to create the white washed look commonly found in the shabby chic style.  I used it on the blue snow flakes and the crochet lace - it is sooo easy to use!  Adirondack Mixatives in snow cap is the perfect product to use on metal to give it that painted white look that is also common to shabby chic.  I used it on the jingly bells, which started out gold.)

ABC Christmas Challenge - R is for recycling and ribbon or rhinestones (I recycled my old curtains)
Magnolia Down Under - frame it (I framed my image with TH ribbon; hope this counts!)
Just Magnolia - Anything goes with optional circles
Simon Says Stamp/Simon Says Stamp and Show - Anything goes and a fun blog hop

Thank you so much for visiting and taking the time to leave a comment - I really appreciate them!  Have a great week! 

Hugs,

Dawn


Monday, August 29, 2011

All that Glitters is Gold

Hello all,

Hope you are well!  I have another card to share and it has been less than a week since my last post!!  Well, last night's dishes are still sitting on the counter... but what can you do when inspiration strikes?  Or is it fear as I realized how many cards I still have to make before Christmas and how few weeks there are remaining?  In spite of this self-inflicted pressure, since taking time off from blogging for my surgery, I have been doing quite a bit better at balancing my life out - no more crazy nights of crafting until 3am and no more tired cranky mom the next day.  As for the dishes, they will still be there tomorrow (unfortunately).

I was really inspired by several challenges to make a different card this time.  I know, if you look at my last post, you might counter that it really isn't all that different.  However, this is my first truly monochromatic card and it is the first time I have used shimmering gold paint.  Actually, I'm not really a fan of gold, so it is also one of the few gold cards I have ever made.  Despite it being gold, I am quite pleased with the result:


Some details:

Stamps - I used Angel Tilda (again - I know); I'll try for some more variety on the next one.  The sentiment is from the Hot Off the Press Christmas Stamp and Punch set and has been embossed with gold embossing powder.
Paper - Anna Griffin, Stampin Up vanilla card to make embellishments, Bazzill for the base(I think) and shimmery gold card.
Colouring - The little cutie is coloured with Distress inks (antique linen, scattered straw, frayed burlap and tattered rose) a watercolour pencil for the skin tone and I added Royal Tempera gold paint to the DI for her gown.  Wings were given a lite colour wash and then filled in with Distress Stickles in clear rock candy.
Other - Gold Stickles frame the image.  The die cuts are Spellbinders Parisian Accents and the tag is a Marvy punch which I distressed with antique linen.  Cream flat-backed pearls are from Kaiser.  I dipped into my jewelry making supplies to create my own pins using freshwater pearls and 4mm bicone Swarovsky crystals in lite colorado - so this card will definitely have to be for someone extra special!  The flower is another of my own creations.  I have promised flower tutorials, so for those interested, a how-to follows at the end of this post.

Tilda's close-up - hope the shimmery gold shows on her gown:


And the artsy view:
 This card was inspired by the following challenges:

Christmas Stampin' All Year Long - monochromatic
Just Magnolia - bingo (I couldn't decide, so I did 2 lines - embossing, flower, pins and gems distress and pins)
Jingle Belles - Midas touch (only gold, silver, white and cream allowed)
Magnolia-licious Challenge - photo inspiration (I went with the colours in the gold and cream purse)
Simon Says Stamp Challenge - for the gorgeous and easy to use sketch
Magnolia Down Under Challenge - texture
Bah! Humbug! - here come the girls (what girl doesn't love pearls and crystals?)

And now for the flower how-to.  There are a lot of photos, so it may take a while to upload :(

Cut three flowers, one at 2.5 inches and two at 2 inches out of thin cardstock.  I cut my flowers with my Straight from the Nest cricut cartridge out of Stampin Up vanilla card. 
Find the centres and mark them with a dot.  Enhance each petal by cutting it deeper toward the centre marking. 
Mist the flowers with water and when they are damp crumple then into tight little balls.  This gives a nice distressed look. 
Gently uncrumple and lay flat. 
To add colour, press ink pad onto craft mat and mist with a little water.  I used DI antique linen again.  Press flowers into ink; they will naturally become darker in the deepest creases.  Dry slightly with a heat tool and repeat until the desired effect is achieved.  Once you are done applying colour, dry flowers slightly, making sure they are still a bit damp - they should be easy to manipulate, but not so wet that they break apart. 
Shape the largest and one of the smaller flowers gently, turning and curling petals until you are pleased with the result. 

The other small flower will be used to make the centre.  Curl/role one of the petals completely into a tight upside down cone. 
Then continue curling so the other petals wrap around it.  There should be three petals wrapped around - remove the last petal by tearing it off.  Again, gently shape and overlap the petals until you are happy with the final result.  Allow to dry completely (you can use a heat tool for this if you are in a rush. 
Once they are dry, punch a whole in the centre of the smaller flower and apply glue (I used Glossy Accents). 

The centre flower is then slid down into the whole to create the first layer.  Once the glue is dry, snip off about half of the tail that sticks out underneath.
Apply glue to the center of the largest flower and gently press the remainder of that tail into the glue to create the final layer.  Embellish your flower as you please and you are done.

If you are still here, thank you so much for visiting.  Thank you also for taking the time to leave me a comment - I appreciate them all.  Hope you've enjoyed my card and have a great day!

Hugs,

Dawn

Wednesday, August 24, 2011

Christmas Angel

Greetings Bloggers,

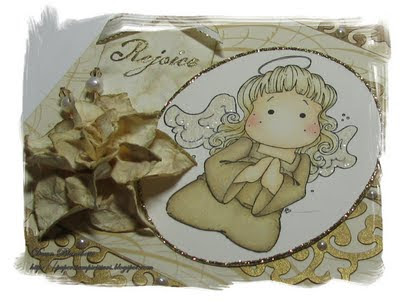
Eeeek! It's been a while!  So long in fact, I couldn't remember how to update my blog.  But I have finally been able to get back into my craft space to create a card.  December is a very hectic month with Christmas and family birthdays so I thought I would try to get ahead on Christmas cards to make life a little easier leading up to the holidays.  Here is my card:

Some details:

Stamps - Angel Tilda, Hot Off the Press Christmas Stamp and Punch (sentiment)
Paper - Bazzill card, Bo Bunny Midnight Frost and 300 g hot pressed watercolour paper
Colouring - 'painted' with Distress inks - tattered rose, antique linen, walnut stain, stormy sky and a watercolour pencil for skin tone
Other - McGill pine branch punch, Nellie Snellen corner die (inked with embossing ink and embossed with Stampin' up iridescent ice), Stickles rock candy and star dust, and the flower is my own creation using a 5 petal flower from my Straight From the Nest Cricut cartridge.  I think this is my favourite flower creation to date.  I cut the flower 3 times - 1 at 2.5 inches and 2 at 2 inches.  Mist with water and crumple.  Carefully uncrumple and add colour if you are going to (I used stormy sky distress ink and Tattered Angels glimmer mist in bubbles).  The paper was too moist to work at this point, so I dried it partially with my heat gun.  Once it was just slightly damp, I shaped the petals and allowed to dry completely.  Once dry, I layered the three flowers together.

My card is for these challenges:

CSAYL - non-traditional colours (no red or green)
Magnolia Stamp Lovers - flowers
Bah! Humbug! - something new (my hot off the press Christmas stamp set)
Magnolia-licious Highlights - only paper (which was really difficult!)


Thanks for stopping by and taking the time to leave a much appreciated comment.  I'll definitely pop by to visit you too!

Hugs,

Dawn

Friday, July 8, 2011

Hello (Vintage) Kitty

Hello bloggers,

Hope everyone had a swell week!  I first of all want to extend a huge thanks to the new gals who have started following my blog!  I am so glad to have you along!

A quick post today as life is a bit hectic at the moment.  It is Friday and time for a brand new challenge at Crafty Catz!  This week, the lovely Dianne is hosting and she has chosen a vintage theme.  So, this week we would love to see vintage cards.

Our wonderful sponsor this week is Robyn's Fetish, who kindly provided the team with a digital paper pack for our cards.  The pack included patterned papers as well as coordinating coloured solid papers, which is great for adapting the papers to whatever you happen to need for your project.  For my card, I used a patterned paper as the base, and then stamped and embossed on a coordinating solid for the next two layers, respectively.  Here is what I came up with:

Supplies:

Cardstock - Bazzill and Stampin' Up
Papers - Digital pack from Robyn's Fetish
Stamps - Stampavie - Hello! from Lawrence collection; Tim Holtz - Urban Chic; sentiment from Hot Off the Press - Labels and Frames
Ink - Stazon - black; Distress inks - tattered rose, pumice stone, antique linen, walnut stain, milled lavender, dusty concord
Other - circle punches for flowers, pearls, cream lace from Kaiser, Marvy tag punch, brass butterflies by Vintaj Natural Brass Co., foam spirals from Magnolia, Stampin' Up antique brad, glimmer mist by Tattered Angels, Tim Holtz Fancy and Floral Frames embossing folder, ribbon from stash.

If you are looking for more inspiration, be sure to check out the wonderful vintage cards my teamies have created.  I hope you will be able to join us this week and look forward to seeing your projects!

I would also like to submit this card for the following challenges:

Stamptacular Sunday - seeing double (two butterflies, two spirals and two sets of pearls)
Charisma Cardz - all about flowers
Craft us Crazy - Christmas in July and/or vintage
Papertake Weekly - anything goes

Thank you so much for stopping by!  I really appreciate your comments; thanks for taking the time to leave them!  Have a great weekend!

Hugs,

Dawn

Friday, July 1, 2011

What's Up?

Hello bloggers,

Happy Friday!  Hope everyone had a great week.  Before I tell you about my card or this week's challenge, I want to send a huge thank you to my new followers - I am so glad to have you along! 
Onto this week's new challenge at Crafty Catz - it is the lovely Carol's turn to host and she has chosen the colours of summer for our challenge.  Digital Delights, our sponsor for this week, has provided us with some cute images to play with and I chose Scrubby Ted for my card.

True to life, this guy got the gorgeous eyelashes - so not fair!  I coloured him with pencils and cut him out.  I made a background on watercolour paper to look like a setting sun (distress inks rusty hinge, spiced marmalade, pine needles and broken china) on a sandy beach and glued him over top.

Other materials used:

Cardstock - Bazzill
Papers - Inque boutique (from a few years ago) and Imaginisce (Splash dance)
Other - surfboard is paper covered chipboard (Inque boutique for both); pearls; sand; flowers - are cut from Straight from the Nest Cricut cartridge, distressed, inked with vintage photo and misted with Tattered Angels Glimmer Mist in Bronze; sentiment is computer generated.  Think that is it.

The artsy view:
One lucky randomly selected winner will receive 3 digital stamps of their choice from Digital Delights.  I hope you will be able to join us!  If you are looking for more inspiration, please check out the wonderful creations of my fellow teamies - they are sure to get your mojo going!

I would also like to enter this card in the following fun challenges/linky party:

Craft Us Crazy - Red, white and blue and/or summer
Papertake Weekly - Sketch
Make it Monday - Anything goes
Stampin' for the Weekend - My favourite things (some of mine are beaches with soft white sand, making my own flowers, flourishes, pearls and designer papers)
Top Tip Tuesday - T is for ? (I have a Teddy bear, Three flowers, Tim Holtz distress inks, and the colours Tangerine and Turquoise, oh - and the teddy is also holding a Towel! and I just noticed I also have Three designer papers too)
My Tip: To make your own dimensional flowers, mist your die/punch/electronically cut flowers with water until they are quite moist.  Crumple them up to give them texture and then gently un-crumple them, leaving the amount of 'wrinkling' desired.  Shape them gently, curling the petals up or down.  Allow to dry thoroughly and then layer, add center pieces and/or glitters/mists.  The dried flowers will have wonderful texture and will be very firm, keeping their shape very nicely.  Now, hopefully I remember to add Tip by my name! :o)

Thank you so much for stopping by and for taking the time to leave a comment.  I so appreciate them and it gives me the chance to visit your blog too!

Hugs,

Dawn