Monday, February 28, 2011

Lured and Hooked

Hello folks,

My son started walking when he was 11 months, and by the time his first birthday rolled around he was sprinting.  He must have inherited that trait from me, for this is only my fifth post on my shiny new blog, and I am already asking to be considered for the Simon Says Stamp Challenge design team.  Of course, he did trip and fall... a lot... On to more positive thoughts - I did stop by to check out some of the other lovely cards from other design team hopefuls and there is a tremendous amount of talent out there.  The gal(s) who are charged with making a decision have none of my envy.  Best of luck to everyone!

For this challenge/application, I created a bridal shower card for a nature loving gal who is not at all a girly girl.  Lace and flowers were out of the question.  So, here is what I came up with:


The cute little image is a Penny Johnson stamp from Stampavie.  Notice how, unlike many men, this little fish is actually smiling in spite of being 'hooked.'  The image was stamped on watercolour paper using black Stazon, matted on dark brown paper and attached with foamies.  This photo shows some of the dimension:


I have coloured it with a combination of Distress inks and Staedtler watercolour pencils as follows:
Bear - pencil #77
Nose, cheeks and inside ears - tattered rose
Trout and waders - walnut stain
Water - pencil #38
Fishing rod - pencil # 80
Sky - pencil # 30
A close up of the image:


The sentiment was generated on my computer.  The beautiful papers are from Stella and Rose by My Mind's Eye and fit the coffee and cream theme of the challenge nicely.  I have inked all the edges with walnut stain and distressed them  with a distressing tool prior to matting them on creamy coloured cardstock.  The hemp twine is from my stash, the button comes from a raid on my mother's button jar and the fishing lure/hook was a raid on my husband's tackle box.  Ok, I'm kidding - I don't think you could catch a fish with this hook - maybe just give it a little indigestion.  The lure was my own creation.  (The real ones can look pretty icky.) I thought even Tom boys need a little bling and I wanted to do something that hasn't been done yet, so I went digging through my beads and found a couple that matched the papers.  Just in case anyone would like to make their own lure to decorate a card or scrapbook page, here is how I made it:

I started with 3 French wires (used to make earrings) and cut off the part that the beads would normally attach to. 


I then attached them together using really thin wire.  I placed a dollop of glue to make sure they stay evenly distributed and allowed to dry completely.  Trim two of the ends, leaving the third one long.


I then wrapped another thicker wire around the hooks and left a long working tail.  Alternatively, you could use some half hard wire and curl it into hooks using a round object as a guide (a big marker would work well).  Leave one of the tails long and trim the other two short.


Next I glued on some feathers, donated by my down comforter, though I understand these can also be purchased at a craft store.  I then wrapped some cord around the tops of the feathers and glued it in place.  String a bead onto the wire.  About 5mm (~1/4inch) above the bead, form a loop in the wire and then wrap the loose end back around the wire several times.  Form another loop, as shown and again wrap the tail end around the wire several more times.  Trim the tail.  If you do not have round nose pliers, you can use any round object you happen to have on hand (a skewer, the tip of a pencil).


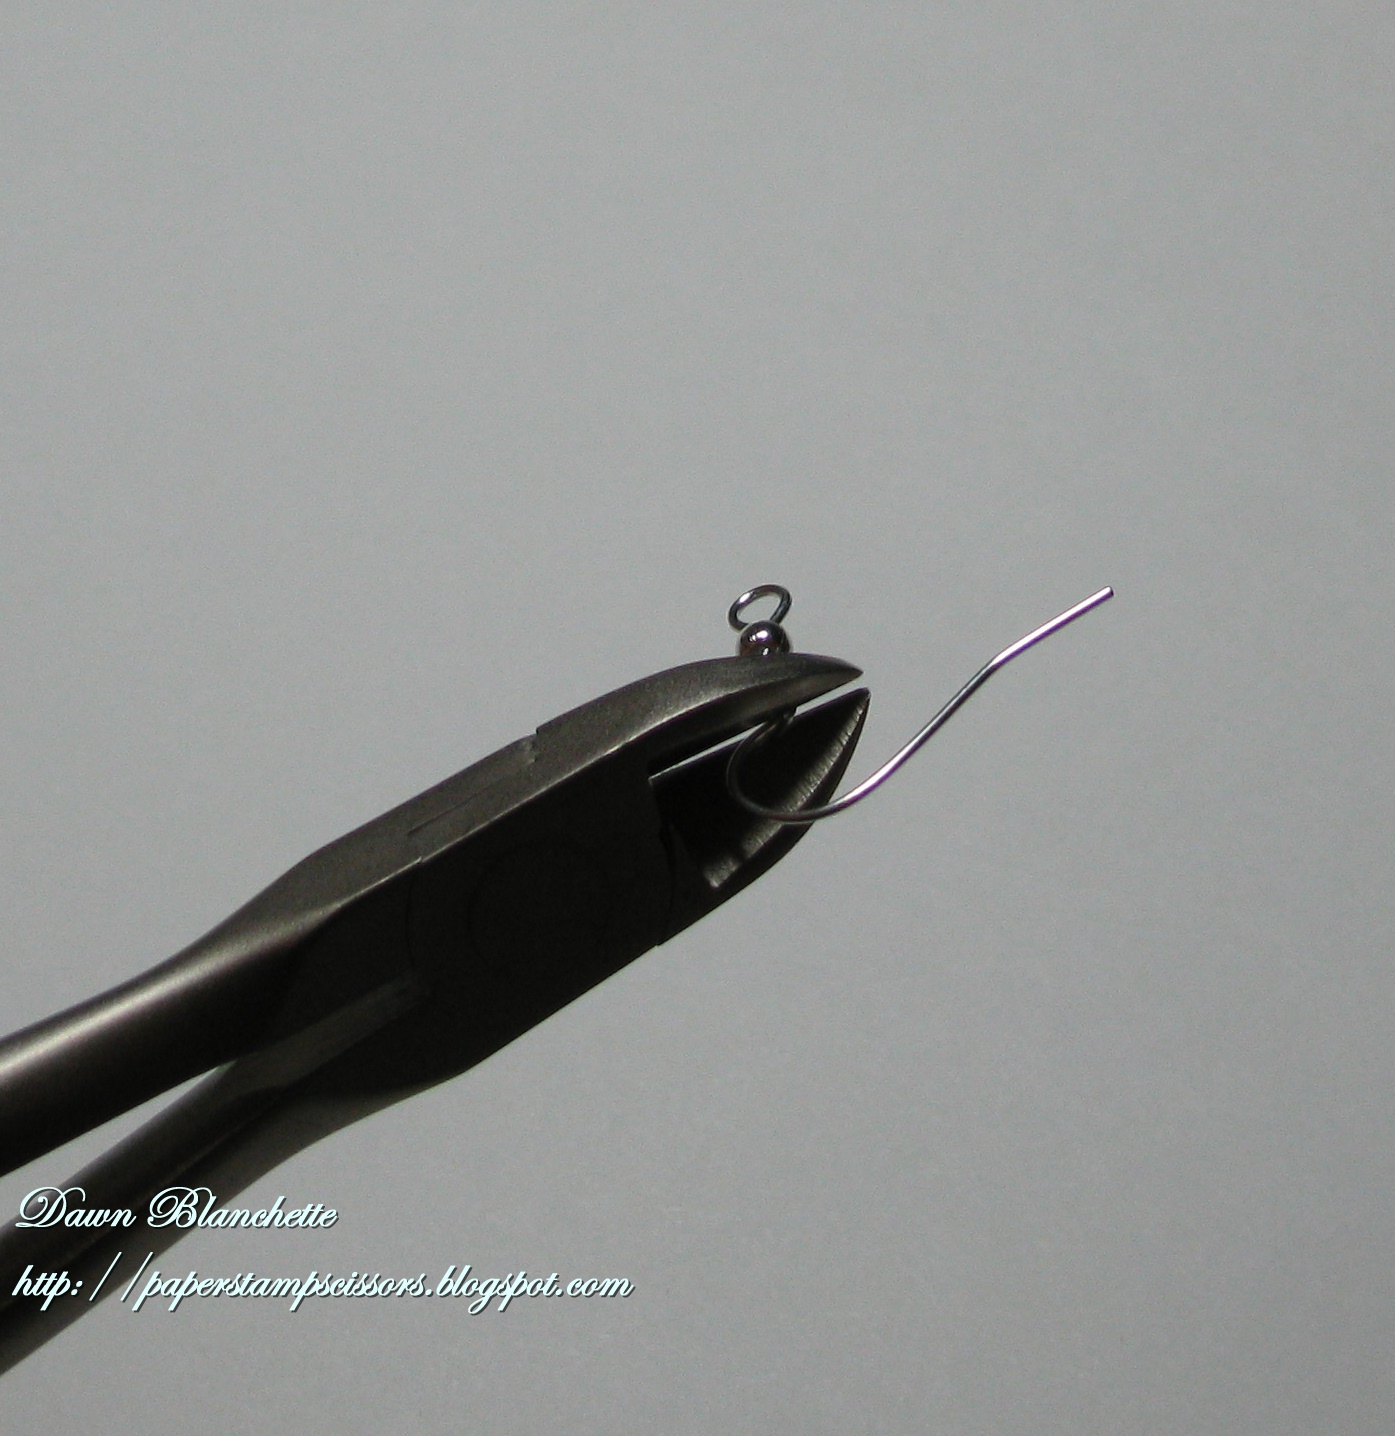
The dangling bead is added by making a loop near the end of a piece of wire. 


Open the loop and insert it into the first loop above the bead.  Close the loop back up and wrap the wire around itself. 


String the bead on and wrap the tail twice in a small circle to secure it.  Trim the tail.


Thank you for stopping by!  I hope you enjoyed my card and tutorial.  A big thank you to everyone who takes the time to leave me their thoughts - I really enjoy reading them.  Thanks to the gals from Simon Says Stamp Challenge for their time and consideration!  Designing along with their talented team would be incredibly fun.  And last, but definitely not least, thank you to the gals who started following my blog!  You have made my week!

Hugs,

Dawn

Monday, February 14, 2011

Toadally Kissable

Hello bloggers,

Happy Valentine's Day!  Hope it was a good one for everyone.  Below is the candy box I made for my hubby for Valentine's day.  He likes his sugar, so a card just wasn't going to cut it.  I used sweet little Fairy Tale Tilda and turned her into a little bit of a goth princess.  That was not my intent when I started - I think we have Tim Holtz and his Regal Flourishes texture fade to blame for that.:) Once I embossed it on a deep red cardstock and inked it in black soot the mood was irreparably set...


Initially, my husband was not sure how to react - he was not terribly fond of playing the role of frog, even if the frog really is a prince.  But then he read the greeting...  I couldn't make a project for him without adding a little joke.  It was all better when he saw the box was full of kisses.

Here is a close up of Tilda:


Supplies used:

Fairy Tale Tilda coloured with Tim Holtz Distress inks (except skin) as follows:
Dress and roses: aged mohagany
Frog: forest moss and scattered straw
Crown: scattered straw
Hair: black soot, weathered wood and faded jeans
Ribbons and flowers: tattered rose and victorian velvet
Leaves: forest moss
Cheeks: tattered rose
Wings: Rock Candy Distress Stickles
Skin coloured with a watercolour pencil

Other stamps include Magnolia 'May your day be special' and Close to my Heart 'Cherished Flourishes'
Paper: Bazzil cardstock, Stampin' Up and unknown from my stash.  Box was made using heavy bristol board.
Other supplies: Martha Stewart edge punch, Tim Holtz Fancy Flourishes texture fade, ribbon from a local scrapbook store.

I am entering this project in the following challenges:

Simon Says Stamp - Anything but a card
Magnolia-licious - Pink, black and red
Friday Sketchers - Sketch
A Spoonfull of Sugar - Let's see some love

Thanks for visiting my blog and have a great week!

Hugs,

Dawn

Thursday, February 10, 2011

The Stork is Coming!

Hello bloggers,

Wow! My second post already!  I am on a roll, though my husband would probably substitute the word addicted.  I'm afraid my cat would agree with him if she could speak English.  I think they are planning an intervention right now. Anyway, on to far more interesting matters...

Today I have a card to share that I have created for the Scrapbooker's Paradise Playing in Paradise Challenge.  I believe this is a new challenge in blog land, making its debut this week.  To kick things off, we were challenged to create a project in their colours - green, gold (yellow) and a touch of burgundy.  As there are new babies on their way in my family, I decided these would be nice gender neutral colors to make a card to welcome a new little one.  I think it ended up being a little masculine, so hopefully one of the babies is a boy.


I used vanilla cardstock for the base and the papers are from DCWV's Nana's Nursery Baby Boy stack.  The adorable image is a Mo Manning design from Stampavie.  I have colored it using watercolor pencils.  The sentiment, which I thought was perfect for the image is from Close to My Heart.  The buttons are from Stampin' Up, the ribbon is from a local scrapbook store (I do not remember the maker), and the edge punch is from Martha Stewart.  Hope you like it!

Good luck to all the gals who played along!

Tuesday, February 8, 2011

Happy Valentine's Day!

Hello everyone!  I have been reading others' blogs for a while now, but always dismissed the idea of starting my own.  Then I discovered all the challenge blogs out there and could not pass up the fun and creativity they offer.  So, welcome to my first post ever on my shiny new blog.  Today I have made a simple valentine's day card using Fairy Tale Tilda.  Hope you like it!  I just discovered these Magnolia stamps late last year and absolutely fell in love with the sweet little characters.

Materials used:

Fairy Tale Tilda is stamped on 300g watercolor paper using Black StazOn and is colored using Ranger Distress inks and watercolor pencils:
Flowers/ribbons: Victorian Velver and Tattered Rose
Hair: Antique Linen and Walnut Stain
Skin: Antique Linen and Staedtler watercolor pencil #43
Cheeks: Tattered Rose
Frog: Scattered Straw and Forest Moss
Leaves/grass: Forest Moss
Dress: Weathered Wood
Wings: Distress Stickles in Rock Candy
Papers are from Stampin' Up and have been distressed and inked with Walnut Stain.
Ribbon is from a local scrapbook store - I do not remember the brand or color name.
Hearts are a fiskars punch.

I am entering this card in the following fun challenges:


Thank you for the opportunity to play and good luck to all who are playing along!